How to Paint Baseboards without Brush Marks?
Brush marks on baseboards? Yeah, I know the struggle is real. It’s like a cruel joke played by the painting gods, ruining all your hard work with those unsightly streaks. But fear not, my friend, because I’m about to drop some serious knowledge that’ll have you slaying those brush marks like a boss.
We’re talking smooth, velvety baseboards that’ll make your neighbors green with envy. And the best part? Achieving that flawless finish is easier than you think. With a few insider tips and a little elbow grease, you’ll be basking in the glory of your handiwork in no time.
So, buckle up and get ready to become the baseboard painting master you were born to be. Let’s do this!

Initial Work to Do for Baseboard Painting
Proper preparation is crucial for achieving a smooth, brush-mark-free finish when painting baseboards. Here are the essential steps to take before you start painting:
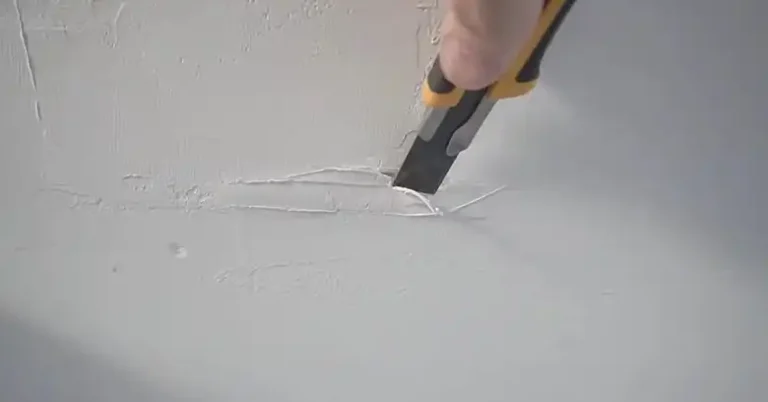
Sand the Baseboard
Sanding the baseboards is an essential step that helps create a smooth surface for the paint to adhere to. Use fine-grit sandpaper (120 – 220 grit or higher) and lightly sand the baseboards, focusing on any rough spots or imperfections. Sanding will also help remove any previous paint or varnish, ensuring a better bond with the new paint.
Tip – Wipe away any dust particles with a damp cloth before moving on to the next step
Take Latex Paint and an Oil-based Additive
For a smooth, brush-mark-free finish, I recommend using a high-quality latex paint and adding an oil-based additive. While latex paint is generally the go-to choice for baseboards due to its easy cleanup, it can sometimes be a bit thick, leading to those brush marks. Adding a small amount of an oil-based additive (specifically designed for latex paints) can help improve the paint’s consistency, making it smoother and easier to apply.
Remember: Always follow the manufacturer’s instructions on the ratio of paint to additive to ensure optimal results.
Choose the Correct Brush
For minimizing brush marks, we want a brush with soft bristles. Soft bristles tend to hold less paint and release it more evenly, minimizing those unwanted streaks. Nylon or poly-nylon bristles are excellent choices for latex paints, offering a good balance of durability and smoothness.
A 2-inch or 2.5-inch angled sash brush is your best friend for baseboards. The angled bristles allow you to reach into tight corners and along edges for clean lines, while the size is perfect for covering larger areas without feeling unwieldy. For very intricate details or moldings, a smaller 1.5-inch brush can be helpful.
Painting Technique for Minimizing Brush Marks

Once you’ve completed the initial preparation steps, it’s time to focus on your painting technique. Here are the key steps to follow:
Prepare the Paint with an Oil-based Additive
Adding an oil-based additive to your latex paint is a game-changer when it comes to achieving a smooth, brush-mark-free finish. These additives are designed to extend the drying time of the paint, allowing for a smoother application and minimizing the risk of brush marks.
When the paint dries too quickly, it can create unsightly brushstrokes and an uneven finish. However, by adding an oil-based additive, you’ll be giving yourself more working time, allowing the paint to level out and self-level before it dries.
To prepare the paint, follow the manufacturer’s instructions for the correct ratio of additive to paint. Typically, you’ll need to add a small amount of the additive to the paint and mix them thoroughly. I recommend using a paint stirrer or a clean stick to ensure that the additive is evenly distributed throughout the paint.
It’s important to note that while the oil-based additive can help minimize brush marks, it can also affect the drying time of the paint. Be sure to follow the manufacturer’s guidance on drying times and allow enough time between coats for the paint to dry completely.
Drip the Brush in the Paint
One of the most common mistakes that lead to brush marks is overloading the brush with paint. When you have too much paint on the brush, it becomes difficult to control the application, and you’re more likely to leave behind unsightly brushstrokes.
To avoid this, dip only the bottom third of the bristles into the paint. This technique ensures that you have just the right amount of paint on the brush, allowing for smooth and even application.
As you dip the brush into the paint, tap it gently against the side of the paint container to remove any excess paint. This will help prevent drips and minimize the risk of creating uneven paint buildup on the baseboards.
Start Applying Painting Strokes
Now comes the fun part (well, maybe)! Here are the key things to remember for achieving a smooth, flawless finish:
- Light, Even Strokes: Apply the paint with gentle, even strokes in the direction of the wood grain. Imagine you’re caressing the baseboard, not attacking it.
- Two to Three Thin Coats: It’s better to apply 2-3 thin coats of paint rather than one thick coat. This allows each layer to dry properly and minimizes the risk of brush marks showing through.
- Cutting In: Start by “cutting in,” which means painting the edges where the baseboard meets the wall and floor. Use the tip of your brush for better control in these tight spaces.
- Laying Off: Once you’ve cut in, use the entire brush to apply paint to the flat surface of the baseboard. Maintain those light, even strokes and avoid overworking the paint.
Remember, the key to minimizing brush marks is to work in small sections, use light strokes, and apply multiple thin coats rather than trying to achieve full coverage in a single thick coat.
By following these techniques and taking your time, you’ll be able to achieve a professional-looking, brush-mark-free finish on your baseboards.
FAQ
Can I use a paint roller instead of a brush?
While a paint roller can be used for baseboards, it’s generally not recommended. Rollers tend to leave behind a textured finish and can create a buildup of paint in corners and edges, increasing the risk of brush marks.
How long should I wait between coats?
It’s essential to allow each coat of paint to dry completely before applying the next one. The drying time can vary depending on the type of paint, temperature, and humidity levels. Typically, you should wait at least 4-6 hours between coats but always refer to the manufacturer’s instructions for the recommended drying time.
Should I use a primer before painting baseboards?
Using a primer is recommended, especially if you’re painting over a significantly different color or if the baseboards have never been painted before. A primer helps improve the adhesion of the paint and can also help minimize the risk of brush marks by creating a smooth, even surface for the paint to adhere to.
Can I use the same techniques for painting trim and moldings?
Yes, the techniques for painting baseboards without brush marks can also be applied to trim and moldings. However, you may need to use a smaller brush or angled brush for intricate details and tight spaces.
Conclusion
Nailed it! You just crushed the baseboard painting game like a total pro. Give yourself a round of applause because those smooth, brush-mark-free baseboards are a sight to behold.
Listen, I know it wasn’t always a walk in the park, but you stuck with it and followed the steps to a T. And now, you get to reap the rewards of your hard work every time you lay your eyes on those flawless baseboards.
If you ever find yourself in need of a refresher or hit a snag, just come back and revisit this guide. I’ll be here, cheering you on like your own personal baseboard painting hype squad. But for now, bask in the glory of your handiwork and prepare to field all the compliments that are headed your way.