Can you PVA and Skim over a Painted Wall?
One of the most common challenges homeowners face is dealing with imperfect walls that need resurfacing. Whether it’s unsightly cracks, dents, or an uneven texture, these flaws can detract from the overall aesthetic appeal of a room. In this case, you may ask whether you can PVA and skim over a painted wall or not.
The good news is that you can indeed PVA (polyvinyl acetate) and skim over a painted wall, allowing you to achieve a smooth, pristine surface without the hassle of stripping the existing paint. This technique is a cost-effective and time-saving solution for transforming your walls.
If you’re considering giving your walls a fresh lease on life, keep reading! In this guide, I’ll explore the process of PVAing and skimming over painted walls, addressing common concerns, and providing you with the knowledge and tips you need to achieve professional-looking results.
Is It Possible to PVA and Skim Over a Painted Wall?
Yes, it is possible to PVA and skim over a painted wall, provided that the surface is properly prepared and the right techniques are followed. This approach can save you time and money compared to stripping off the existing paint and starting from scratch.
However, there are some certain conditions that determine whether it is possible or not to PVA or skim over a painted wall. Let’s explore them below.
When Can You PVA and Skim Over a Painted Wall?
You can apply PVA over a painted wall in the following scenarios:
- Matte or Flat Paint: PVA adheres well to matte or flat paint finishes, making them ideal surfaces for the skimming process.
- Lightly Sanded Surface: If the painted surface has a semi-gloss or glossy finish, it should be lightly sanded to create a rough texture for better PVA adhesion.
- Clean and Dry Surface: The painted wall must be clean, free of any grease, dirt, or loose paint chips, and completely dry before applying PVA.
You can skim over a painted wall after successfully applying the PVA primer coat and allowing it to dry completely. The PVA acts as a binding agent, ensuring proper adhesion of the skim coat to the painted surface.
When You Can’t PVA and Skim Over a Painted Wall?
Situations Unsuitable for PVA:
There are certain situations where PVAing over a painted wall is not recommended:
- Peeling or Flaking Paint: If the existing paint is peeling or flaking, it’s best to remove it first before attempting to PVA and skim.
- Moisture Issues: If the wall has moisture problems or has been recently exposed to water, it’s advisable to address the moisture issue first before proceeding with PVA and skimming.
- Specific Paint Types: Certain types of paints, such as oil-based or epoxy paints, may not be suitable for PVAing and skimming. It’s best to consult with a professional or the paint manufacturer for guidance.
Situations Unsuitable for Skim:
While skimming over a painted wall is generally possible with proper preparation, there are situations where it may not be advisable:
- Poor PVA Adhesion: If the PVA primer coat fails to adhere properly to the painted surface, skimming over it could lead to adhesion issues and eventual failure of the skim coat.
- Extensive Damage or Repairs Needed: If the wall has significant damage, such as large cracks or holes, it may be better to address these issues first before considering skimming.
- Specific Paint Types: As mentioned earlier, certain types of paints may not be suitable for skimming, and it’s best to consult with a professional or the paint manufacturer for guidance.
Remember, proper surface preparation and following the right techniques are crucial for achieving a successful and long-lasting result when PVAing and skimming over a painted wall.
The Importance of Surface Preparation
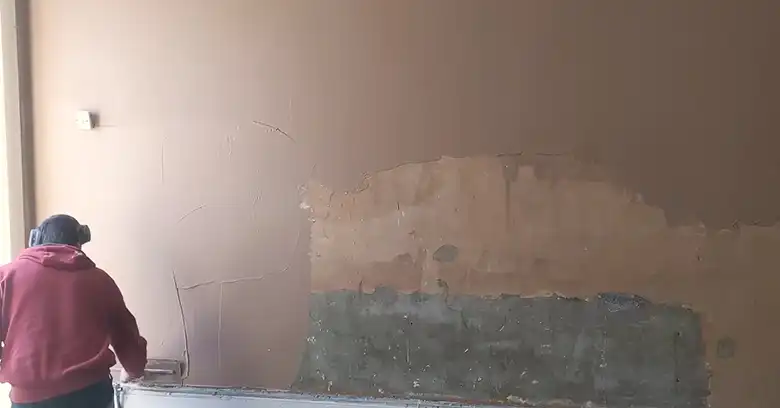
Before diving into the process of PVAing and skimming, it’s crucial to understand the importance of proper surface preparation. Skimming over a painted wall without the appropriate groundwork can lead to adhesion issues, resulting in a short-lived and unsatisfactory outcome.
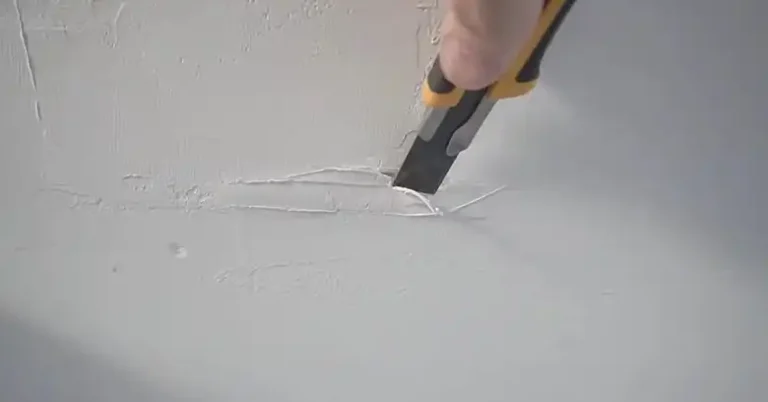
The first step is to thoroughly clean the painted surface, removing any dirt, grease, or loose paint chips. This ensures that the PVA and skim coat will adhere properly to the wall. Additionally, any major cracks, holes, or dents should be filled and sanded smooth before proceeding.
How to Apply PVA Over a Painted Wall
PVA, or polyvinyl acetate, is a crucial component in the skimming process. It acts as a binding agent, helping the skim coat adhere to the painted wall. Here’s how to apply PVA correctly:
Step 1: Dilute the PVA- Most PVA products require dilution with water. Follow the manufacturer’s instructions for the recommended ratio, typically around 1 part PVA to 3 parts water.
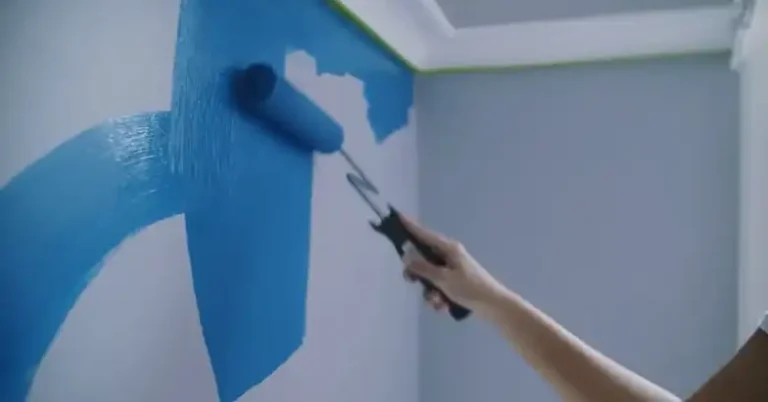
Step 2: Apply with a brush or roller- Using a good-quality brush or roller, apply the diluted PVA evenly across the painted surface. Ensure complete coverage, paying special attention to corners and edges.
Step 3: Allow to dry- Once applied, let the PVA dry completely before proceeding to the skimming step. This typically takes several hours, depending on the room’s temperature and humidity levels.
The Skimming Process
Skimming is the crucial step that transforms your painted wall into a smooth, flawless canvas. Here’s how to tackle it:
Step 1: Prepare the skim coat- Mix the skimming compound (also known as joint compound or drywall mud) according to the manufacturer’s instructions. The consistency should be thick enough to hold its shape but still spreadable.
Step 2: Apply the skim coat- Using a drywall taping knife or a plasterer’s trowel, spread the skim coat evenly over the PVAed surface. Work in sections, applying a thin layer, and letting it partially dry before adding additional coats if needed.
Step 3: Feather the edges- As you reach the edges of the wall or any corners, feather the skim coat to create a seamless transition.
Step 4: Sand and inspect- Once the skim coat has fully dried, lightly sand the surface to remove any imperfections or high spots. Inspect the wall closely and apply additional coats if necessary.
Tips for a Flawless Finish
- Use high-quality materials: Invest in good-quality PVA, skimming compound, and tools for the best results.
- Work in stages: Tackle one wall or section at a time to ensure consistent application and drying times.
- Proper lighting: Adequate lighting is crucial for inspecting the surface and identifying any imperfections that need addressing.
- Ventilation: Ensure proper ventilation in the workspace to aid in the drying process and minimize any strong odors.
- Patience is key: Rushing through the process can lead to subpar results. Take your time and allow each step to fully dry before proceeding.
Endnotes
Skimming over a painted wall is a viable and cost-effective solution for achieving a smooth, flawless surface. By following the steps outlined in this guide and exercising patience and attention to detail, you can transform your living spaces without the need for extensive renovation work. If you have any further questions or need additional guidance, feel free to leave a comment below. We’re here to help you achieve the beautiful, seamless walls you’ve been dreaming of. Thank you for reading, and best of luck with your home improvement projects!
People Also Asked
What Type of Paint Should Be Used After Skimming?
After skimming, it’s recommended to use a high-quality latex or acrylic paint specifically designed for interior walls. These paints will provide a durable and long-lasting finish over the skim-coated surface.
Can I Skim Over Glossy or Semi-Gloss Paint?
While it is possible to skim over glossy or semi-gloss paint, it’s essential to properly degloss and roughen the surface first. This will ensure better adhesion of the PVA and skim coat.
How Long Should I Wait Before Painting After Skimming?
It’s crucial to allow the skim coat to fully cure before painting, which typically takes 24-48 hours, depending on the product and environmental conditions. Painting too soon can lead to adhesion issues and a compromised finish.
Can I Skim Over Wallpaper?
Skimming over wallpaper is generally not recommended, as the wallpaper can pose adhesion issues and potentially lead to bubbling or peeling. It’s best to remove the wallpaper first and prepare the surface properly.
Is Skimming Over Painted Walls a Permanent Solution?
Skimming over painted walls is a long-lasting solution, but it’s not necessarily permanent. Over time, the skim coat may develop cracks or imperfections due to settling or other environmental factors. Regular maintenance and touch-ups may be required to maintain the desired finish.