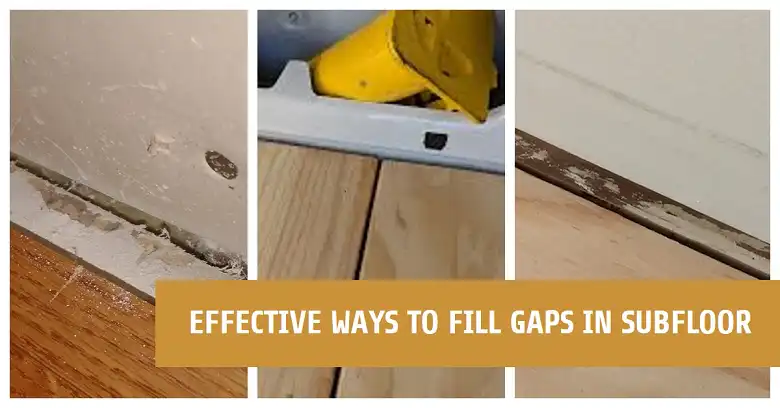
What to Use to Fill Gaps in Subfloor?
When it comes to flooring installations, a smooth and even subfloor is the foundation for a successful project. However, gaps in the subfloor can be a common issue that, if left unaddressed, can lead to a variety of problems. These gaps can compromise the structural integrity of your floors, cause squeaky floorboards, create uneven surfaces, and even damage your finished flooring.
To fill those gaps in the subfloor, you can use wood, concrete, or, foam insulation, depending on the size of the gap.
In this article, we’ll explore the art of filling gaps in subfloors, to ensure a solid base for your flooring project. Let’s begin with how you can understand the nature of the gap.
How to Figure Out the Size and Nature of the Subfloor Gap?
Before diving into the repair process, it’s crucial to understand the nature of the gap you’re dealing with. Gaps in subfloors can vary in size, location, and underlying cause, and identifying these factors will help you choose the right solution.
Size and Location
The first step is to measure the gap and identify its location. Is it between joists, around pipes, or near walls? Pay close attention to the width of the gap, as different methods are suited for different sizes. Generally, gaps wider than ⅛ inch are not recommended for filling and may require professional attention or more extensive repairs.
Subfloor Material
The type of subfloor material you’re working with is also essential. Is it a wood subfloor, concrete, or another material? Different fillers and repair methods work best with specific materials, so it’s crucial to identify the subfloor type before proceeding.
Root Cause
Identifying the root cause of the gap is key to preventing future issues. Gaps can form due to various reasons, such as improper installation, shrinkage, moisture damage, or structural movement. By addressing the root cause, you can prevent new gaps from appearing after the repair.
How to Choose the Right Subfloor Gap Filler?

With the gap’s characteristics identified, it’s time to choose the appropriate filler material. The choice depends on several factors, including the gap size, subfloor material, and the type of flooring you plan to install.
Gap Size
Small gaps (up to ⅛ inch): For small gaps, wood putty, construction adhesive, or caulk (for non-structural gaps only) can be effective solutions. These materials are easy to apply and can create a smooth finish.
Medium gaps (⅛ inch to ¼ inch): For medium-sized gaps, consider using construction adhesive, epoxy wood filler, or a concrete patch, depending on the subfloor material. These options provide a stronger bond and can help reinforce the subfloor.
Large gaps (¼ inch and above): Larger gaps may require more substantial fillers like self-leveling compounds, epoxy patches, or even replacing a section of the subfloor. These solutions are designed to fill and level larger areas, creating a smooth and even surface.
Subfloor Material
Wood subfloors: For wood subfloors, options include wood putty, construction adhesive, self-leveling patches, and epoxy wood fillers. Each of these materials has its own strengths and applications, so choose the one that best suits your specific needs.
Concrete subfloors: If you’re dealing with a concrete subfloor, concrete patches, self-leveling concrete compounds, and epoxy patches are suitable options for filling gaps. These materials are designed to bond well with concrete and provide a durable repair.
Other materials: If you have a subfloor made of materials like plywood or oriented strand board (OSB), consult with a professional or refer to manufacturer recommendations for the appropriate filler.
Floor Covering Compatibility
When selecting a filler material, it’s essential to consider the type of flooring you plan to install over the subfloor. Some fillers may not be compatible with certain flooring materials, potentially causing adhesion issues or compromising the lifespan of your new flooring. Always check the manufacturer’s recommendations and, if possible, test the filler on a small area first to ensure compatibility.
Other Considerations
In addition to gap size, subfloor material, and flooring compatibility, consider factors like drying time, flexibility, strength, water resistance, and cost when choosing a filler. Some fillers may be better suited for specific applications or environments, such as moisture-prone areas or high-traffic zones.
Popular Filler Options
To help you make an informed decision, let’s explore some popular filler options for both wood and concrete subfloors.
Wood Subfloors
Wood Putty: Wood putty is an excellent choice for small gaps in wood subfloors. It’s easy to use, paintable, and can create a smooth finish. However, it may not be suitable for larger gaps or areas that require significant structural support.
Construction Adhesive: For larger gaps in wood subfloors, construction adhesive can be an effective solution. It provides a strong bond and can help reinforce the subfloor. However, it may require sanding for a smooth finish, and proper application is crucial to ensure adequate adhesion.
Self-Leveling Patch: Self-leveling patches are ideal for larger gaps or uneven surfaces in wood subfloors. These products are designed to flow and level themselves, creating a smooth finish. They can be particularly useful for filling multiple gaps or depressions in the subfloor.
Epoxy Wood Filler: Epoxy wood fillers are incredibly strong and waterproof, making them a great choice for repairing cracks and gaps in wood subfloors, especially in moisture-prone areas. They can also be used to fill larger gaps and provide a durable, long-lasting repair.
Concrete Subfloors
Concrete Patch: For small to medium gaps in concrete subfloors, a concrete patch can be an effective solution. These products are designed to level uneven surfaces and can be easily applied and smoothed.
Self-Leveling Concrete: For larger gaps or uneven surfaces in concrete subfloors, self-leveling concrete compounds are an excellent choice. These products flow and level themselves, creating a smooth and even surface. However, they require careful application and may need additional preparation steps, such as priming the subfloor.
Epoxy Patch: Epoxy patches are strong, waterproof, and suitable for repairing cracks and gaps in concrete subfloors. They can also be used to level uneven surfaces and provide a durable, long-lasting repair.
Other Options
Caulking: While not suitable for structural support, caulking can be an option for small, non-structural gaps. It’s easy to apply and can provide a temporary or cosmetic fix.
Foam Backer Rod: Foam backer rods are used to fill large gaps before applying caulk or sealant. They help create a solid base for the filler material and can be especially useful in areas where significant expansion or contraction is expected.
Rigid Foam Insulation: In some cases, rigid foam insulation boards can be used to fill larger gaps in subfloors. This method is particularly useful when addressing both gap filling and insulation needs.
How to Fill the Gaps in a Subfloor?

Once you’ve chosen the appropriate filler material, it’s time to tackle the gap repair process. Here are the steps to follow:
Preparation
Proper preparation is key to ensuring a successful repair. Start by cleaning the area thoroughly, and removing any debris, dust, or loose material from the gap and surrounding area. This will ensure proper adhesion and a smooth finish. Next, use painter’s tape or other masking materials to protect the areas around the gap from accidental filler application.
Additionally, some fillers can have strong odors or release fumes, so make sure the area is well-ventilated during application and curing. Open windows, use exhaust fans, or consider working outdoors if possible.
Mixing and Application
Carefully read and follow the manufacturer’s instructions for mixing and applying the chosen filler material. Different products may require specific mixing ratios or techniques, so it’s essential to follow the guidelines precisely.
Once the filler is mixed, use the appropriate tools (e.g., putty knife, trowel) to apply the material into the gap. Ensure that the gap is completely filled, and the filler is level with the surrounding subfloor. For larger gaps, it may be necessary to apply the filler in multiple layers, allowing each layer to dry or cure before applying the next.
Leveling and Finishing
After the filler has been applied, use a trowel or putty knife to level and smooth the surface, ensuring a flush finish with the surrounding subfloor. This step is crucial for creating a seamless transition and preventing any potential tripping hazards or unevenness.
Once the filler has dried or cured, you may need to lightly sand the area to create a perfectly smooth surface, especially if you plan to install a smooth flooring material like vinyl or tile. Be careful not to oversand and damage the surrounding subfloor.
Drying and Curing
Follow the manufacturer’s instructions for the recommended drying time before proceeding with any additional steps or flooring installation. Some fillers may require a longer drying time than others, so be patient and allow the material to fully cure.
Additionally, certain fillers may require a curing period after drying to achieve maximum strength and adhesion. Ensure you allow for the recommended curing time before subjecting the area to any significant stress or foot traffic.
Additional Tips
Safety Precautions
When working with various filler materials, safety should be a top priority. Always wear appropriate personal protective equipment (PPE), such as gloves, eye protection, and a respirator, especially when working with chemical-based fillers or products with strong odors. Proper ventilation is also crucial to avoid inhaling fumes or vapors.
Preventative Measures
While filling gaps is a common repair, it’s essential to address the root cause of the issue to prevent future gaps from appearing. Proper subfloor installation, moisture control, and addressing any structural issues can help minimize the need for future repairs.
If you’re unsure about the underlying cause or the extent of the damage, it’s always better to consult with a professional. They can assess the situation and provide expert guidance on the best course of action.
When to Seek Professional Help
While many gap repairs can be tackled as a DIY project, there are situations where seeking professional assistance is recommended. Complex repairs, large or uneven gaps, or structural issues may require the expertise of a flooring professional or contractor.
Additionally, if you’re unsure about the scope of the repair or the appropriate materials to use, consulting a professional can help ensure a successful outcome and prevent costly mistakes.
Moisture Concerns
Moisture can be a significant concern when it comes to subfloor gaps and repairs. Excess moisture can lead to warping, mold growth, and other issues that can compromise the integrity of the subfloor and the flooring installed over it.
In moisture-prone areas or damp environments, it’s crucial to choose moisture-resistant filler materials and consider installing a moisture barrier or vapor retarder as part of the repair process. This will help protect your subfloor and flooring from moisture-related damage.
Compatibility with Flooring Materials
Before selecting a filler material, ensure compatibility with your planned flooring material. Consult the manufacturer’s recommendations for both the filler and the flooring to avoid potential issues with adhesion, discoloration, or premature failure.
If possible, test the filler on a small, inconspicuous area before proceeding with the full installation. This will allow you to identify any compatibility issues and make adjustments if needed.
Subfloor Maintenance and Repair
Even after a successful gap repair, it’s essential to perform regular inspections and maintain the subfloor to prevent future issues.
Regular Inspections: Periodically check the subfloor for any new cracks, gaps, or signs of damage. Addressing these issues promptly can prevent further deterioration and the need for more extensive repairs.
Repairing Cracks or New Gaps: If you notice new cracks or gaps forming, don’t hesitate to address them using the appropriate filler materials and techniques outlined in this guide.
Refinishing or Replacing Flooring: In some cases, significant subfloor damage or repeated repairs may necessitate refinishing or replacing the flooring altogether. This decision should be made in consultation with a professional, taking into account factors like the extent of the damage, cost, and desired lifespan of the flooring.
End Notes
Filling gaps in subfloors is an essential step in ensuring a smooth, stable, and long-lasting flooring installation. By understanding the nature of the gap, selecting the appropriate filler material, and following the proper application techniques, you can create a solid foundation for your new flooring.
Remember, proper subfloor preparation is key to a successful flooring project. While many gap repairs can be tackled as a DIY project, don’t hesitate to seek professional assistance when dealing with complex or structural issues.