How Much Thinset Do I Need to Remove?
Thinset mortar provides the crucial bond between your tiles and the substrate. However, when it comes time to remove or replace tiles, dealing with excess thinset can be a challenging task. The amount of thinset you need to remove depends on various factors, and getting it right is essential for a smooth, level, and durable new tile surface.
In general, you’ll need to remove enough thinset to create a flat surface that’s no more than 1/4 inch (6.35 mm) thick. This typically means removing any excess thinset that protrudes above the level of the surrounding area. The exact amount will vary based on how the original tiles were installed and the condition of the substrate underneath.
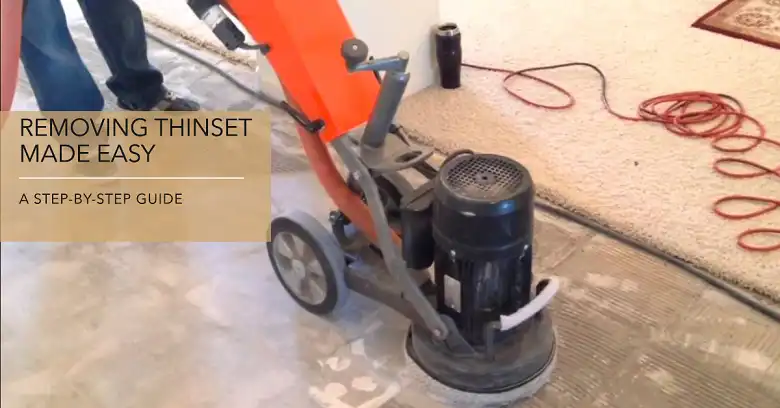
Removing Thinset: What It Depends On
Thickness of Existing Thinset Layer
The thickness of the existing thinset layer is perhaps the most crucial factor in determining how much you need to remove. Thinset thickness can vary widely, typically ranging from 1/8 inch to 3/8 inch (3.175 mm to 9.525 mm). In some cases, particularly with improper installation, it can be even thicker.
Size of the Area to be Worked On
The size of the area you’re working on will directly impact the volume of thinset you’ll need to remove. A small bathroom floor will obviously require less work than a large commercial space. To estimate the area, multiply the length by the width of the space in square feet or square meters.
Type of New Flooring to be Installed
The type of flooring you plan to install will influence how much thinset needs to be removed. For example:
- If you’re replacing tile with tile, you may be able to leave some thinset in place as long as it’s level and well-adhered.
- If you’re switching to hardwood or vinyl, you’ll likely need to remove all the thinset to create a completely smooth surface.
Condition of the Subfloor
The condition of your subfloor plays a role in determining how much thinset to remove. If the subfloor is damaged or uneven, you may need to remove more thinset to address these issues before installing new flooring.
[Suggestion for image: A diagram showing different layers of flooring, including subfloor, thinset, and tile. Search term: “tile floor layers diagram”]
Thinset Removal Recommendations for Different Scenarios
Installing New Tile Over Existing Thinset
If you’re installing new tile over an area with existing thinset, you may not need to remove all of it. As long as the existing thinset is well-adhered and relatively smooth, you can often install new tile directly over it. However, you should remove any loose or protruding thinset to ensure a level surface.
Changing Flooring Type
When switching from tile to another flooring type, such as hardwood or vinyl, you’ll typically need to remove all the thinset to create a smooth, level surface. This is crucial for the proper installation and longevity of the new flooring.
Repairing Damaged Subfloor
If your subfloor is damaged, you may need to remove all the thinset to access and repair the subfloor. In this case, complete removal is necessary to ensure a stable foundation for your new flooring.
How to Calculate the Amount of Thinset You Need to Remove
To estimate the amount of thinset you need to remove, follow these steps:
- Measure the area: Calculate the square footage by multiplying the length and width of the space.
- Determine average thickness: Estimate the average thickness of thinset to be removed.
- Calculate volume: Multiply the area by the average thickness to get the volume in cubic feet or meters.
- Add a waste factor: Include an additional 10-15% for waste and uneven areas.
Here’s a simple formula:
Volume of thinset to remove (cubic feet) = Length (ft) × Width (ft) × Average Thickness (ft) × 1.15 (waste factor)
For example, for a 10′ × 12′ room with an average thinset thickness of 1/4″: Volume = 10 × 12 × (1/4 ÷ 12) × 1.15 = 2.875 cubic feet
Step-by-Step Guide to Thinset Removal
Now that you know how to calculate how much thinset you need to remove, here’s a step-by-step guide on how to do it:
- Prepare the area: Remove all furniture and cover any surfaces you want to protect.
- Put on safety gear: Wear safety glasses, a dust mask, and work gloves.
- Remove any remaining tiles: If tiles are still in place, remove them carefully.
- Choose your removal method: Based on the area size and thinset condition, select manual tools, power tools, or chemical removers.
- Begin removal: Start in a corner and work your way across the room. For power tools, move in a consistent pattern to ensure even removal.
- Check your progress: Periodically check the surface level to ensure you’re removing enough thinset.
- Clean up: Sweep or vacuum debris regularly to maintain visibility and prevent dust accumulation.
- Final inspection: Once you’ve removed the bulk of the thinset, carefully inspect the surface for any remaining spots or high areas.
- Smooth the surface: Use a floor grinder or sander to create a perfectly smooth surface if needed.
- Clean thoroughly: Vacuum and wipe down the area to remove all dust and debris.
Advanced Thinset Removal Techniques
Dealing with Cured Thinset
Thinset that has been cured for a long time can be particularly challenging to remove. In these cases, mechanical methods (like grinding) are often the most effective. Be prepared for a more time-consuming and labor-intensive process.
Removing Thinset from Delicate Surfaces
When working with delicate surfaces like marble or natural stone, extra care is needed. Use gentler methods and avoid harsh chemicals or aggressive grinding that could damage the surface.
Bottom Line
Removing thinset is a crucial step in many flooring renovation projects. The amount you need to remove depends on various factors, including the existing thinset thickness, the area size, and your plans for the new flooring. By carefully assessing your situation and choosing the right removal method, you can create a smooth, level surface for your new floor.


