Dryer Vent Hose Won’t Stay On |[Answered]
Frustrated with damp clothes after drying? Or smelling something strange in the laundry room? A disconnected dryer vent hose could be the culprit. This hose safely removes hot, moist air from your dryer, preventing damp clothes and potential fire hazards.
When the hose detaches, hot air and lint can build up, causing longer drying times, higher energy bills, and a fire risk. This guide will help you fix the issue. We’ll explore reasons the hose detaches, like a loose clamp or damaged hose, and provide simple solutions to keep your dryer running safely and efficiently.
Types of Dryer Vent Hose
Not all dryer vent hoses are created equal. Understanding the different types can help you make an informed decision when it’s time for a replacement.
Flexible Foil Hose: This is the most common type, made of aluminum foil wrapped around a wire coil. It’s lightweight, flexible, and relatively inexpensive. However, its ridges can trap lint, and it’s prone to kinking or crushing, which can impede airflow. While it’s better than plastic, it’s not the best choice for long-term use.
Semi-Rigid Aluminum Hose: A step up from foil, this hose is more durable and less likely to trap lint. It’s still flexible enough to navigate corners but maintains its shape better. It’s a good balance of cost, durability, and performance.
Rigid Metal Duct: The gold standard in dryer venting. Made of solid aluminum or galvanized steel, it provides the smoothest airflow, minimizes lint buildup, and is the most durable. It’s more challenging to install, especially around corners, but it’s the safest and most efficient option.
Flexible Plastic Hose: This is the type you should avoid. It’s often white or gray and can come with some new dryers. It’s a fire hazard because it’s flammable and traps lint easily. In fact, it’s illegal in many jurisdictions for dryer venting.
Among these, the flexible foil hose is most likely to fall off due to its lightweight nature and tendency to kink or crush, which can stress the connection points. Always opt for a UL 1918 listed hose for safety, regardless of the type you choose.
Why the Dryer Vent Hose Won’t Stay On?
A dryer vent hose that keeps coming loose is more than just annoying. It can degrade your dryer’s performance and even be a safety hazard. But before getting into the fixes, it’s necessary to explore the most common reasons why your dryer vent hose won’t stay on. So, let’s get started!
Improper Connection
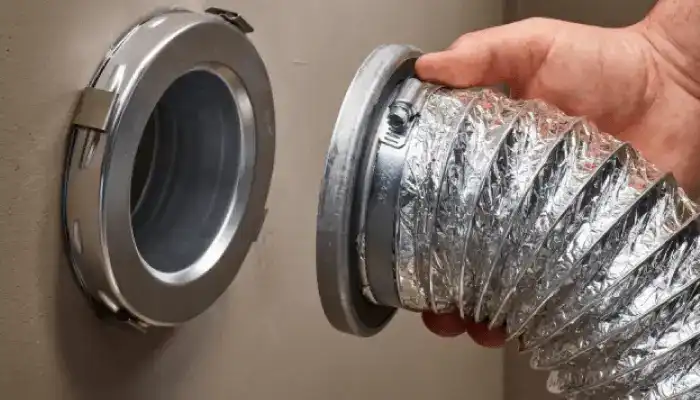
Loose or Faulty Clamp: The clamp secures the hose to both the dryer and the wall vent. Over time, vibrations from the dryer can loosen the clamp, or it might break due to age or poor quality. A loose clamp is like a loose belt; it won’t hold things in place. Signs include visible gaps between the hose and vent, or finding the clamp on the floor.
Misalignment: When your hose and vent are misaligned, it can potentially cause this issue. This can occur during installation or if the dryer gets bumped. Even a slight misalignment can prevent a secure connection, leading to air leaks and eventual detachment.
Hose Issues
Incorrect Size: Dryer vents and hoses come in different diameters, commonly 3 or 4 inches. Using a 3-inch hose on a 4-inch vent is like wearing shoes that are too small; it’s uncomfortable and ineffective. The loose fit allows the hose to slip off easily.
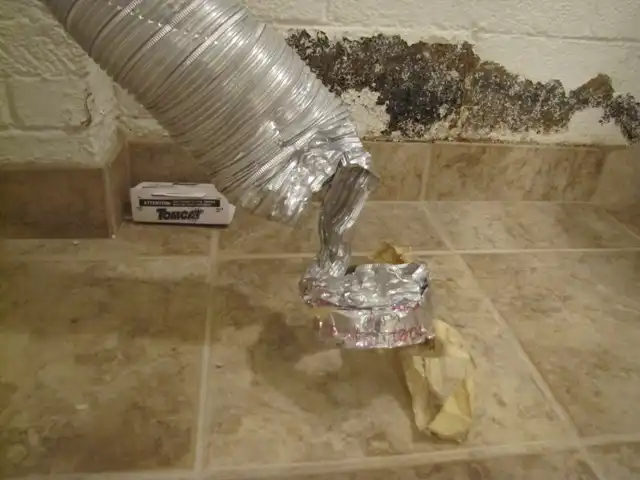
Damage: Over time, your hose can develop tears or cracks. This is especially true for foil or plastic hoses. A small tear can widen under the pressure of hot air, causing the hose to detach. In severe cases, a damaged hose can completely split, leaving your dryer unvented.
Sharp Bends: A dryer hose isn’t a contortionist. Sharp bends or kinks can restrict airflow, causing back pressure that can push the hose off its connection. Think of it like kinking a garden hose; the water (or in this case, air) will find another way out.
Short Hose: If your vent hose is too short, even moving the dryer out a few inches for cleaning or retrieving lost items can cause it to detach. Always ensure you have a bit of slack in the hose to accommodate minor movements.
External Factors
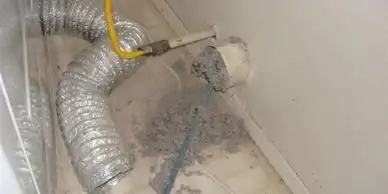
Lint Buildup: Every load of laundry produces lint, which gets blown through the hose. Over time, lint can accumulate, especially in flexible hoses with ridges. This buildup restricts airflow. The reduced airflow increases back pressure, which can slowly push the hose off.
Pet Interference: Curious pets, especially cats, might see the warm, vibrating hose as a fun toy. A playful swat or a jump can easily disconnect a loosely attached hose. It’s not the pet’s fault; they’re just being their curious selves!
Accidental Disconnection: When you slide your dryer out for cleaning or to retrieve lost socks, you might unknowingly disconnect the vent hose, especially in tight spaces. Always move your dryer with care to avoid this issue.
How to Keep Your Dryer Vent Hose Stay On?
Now that we understand the ‘why,’ let’s roll up our sleeves and tackle the ‘how.’ Most dryer vent issues can be resolved with some basic tools and a bit of elbow grease. Here’s your DIY guide to keeping that hose in place.
Tools and Parts You’ll Need
- Nut driver
- Screwdriver
- Adjustable wrench
- Flashlight
- New dryer vent hose/tube (if needed)
- New dryer vent clamps (if needed)
Fixing Connection Issues
Tightening the Clamp
Step 1: Unplug your dryer for safety. If it’s a gas dryer, turn off the gas valve.
Step 2: Locate the clamps at both ends of the hose. You’ll need a screwdriver (flathead or Phillips, depending on the clamp).
Step 3: Tighten the screw until the clamp is snug, but not so tight that it deforms the hose. The clamp should be about 3/4 inch from the open end of the hose.
Step 4: If the clamp is damaged, replace it. They’re inexpensive and available at any hardware store.
Realigning the Hose
Step 1: Pull the dryer out gently. If it’s a gas dryer, be extra cautious not to strain the gas line.
Step 2: Check the alignment. The hose should have a straight shot or gentle curves to the wall vent.
Step 3: If needed, adjust the dryer’s position or the hose’s path. A properly aligned hose is less likely to detach.
Replacing the Vent Hose
Choosing the Right Hose
Step 1: Select a UL 1918 listed hose for fire safety.
Step 2: Measure your vent openings to get the right size (usually 3 or 4 inches).
Step 3: For most homes, a semi-rigid aluminum hose offers a good balance. If you have space for a straight run, a rigid metal duct is best.
Step 4: Ensure the hose is long enough to allow some slack for minor dryer movements.
Replacement Steps
Step 1: Unplug the dryer and pull it away from the wall. For gas dryers, turn off the gas and disconnect the gas line only if necessary.
Step 2: Use a flashlight to see which end of the hose is disconnected.
Step 3: Loosen the clamps and remove the old hose. Check for damage on the hose, clamps, and vent openings.
Step 4: Clean both the dryer and wall vent openings.
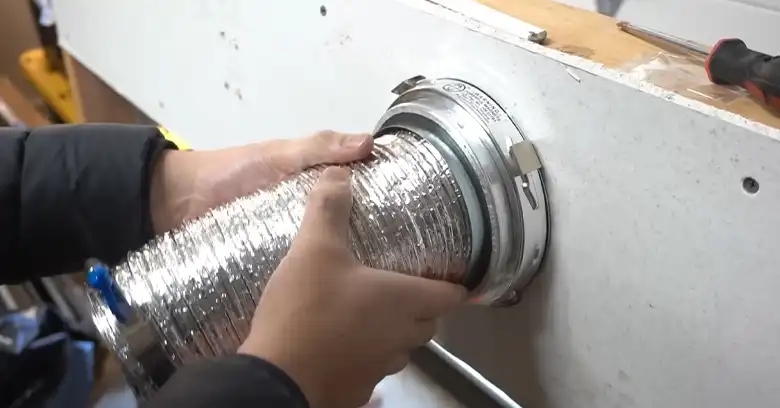
Step 5: Attach one end of the new hose to the dryer vent, and secure with a clamp.
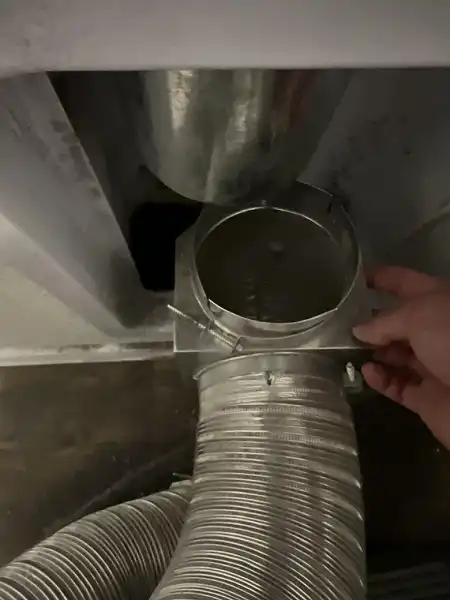
Step 6: Connect the other end to the wall vent, and secure with another clamp.
Step 7: Push the dryer back, ensuring no kinks in the hose. Keep bends gently for optimal airflow.
Mitigating External Factors
Cleaning the Vent System
Step 1: This is more than just the hose. Annually (or more if you do lots of laundry), clean from the dryer to the outside vent.
Step 2: Use a vacuum for visible lint, then a dryer vent cleaning kit (a brush on a long, flexible rod) to clean deeper.
Step 3: This not only prevents detachment but also improves dryer efficiency and reduces fire risk.
Temporary Fix with Foil Tape
Step 1: In a pinch, UL 1918 listed foil tape can secure a loose connection.
Step 2: Wrap it around the junction of the hose and vent.
Step 3: But remember, this is temporary. Regular foil tape can be a fire hazard, so only use dryer-specific tape.
Step 4: Replace the clamp or hose as soon as possible.
Testing Your Fix
Step 1: Once everything is secure, run a test load.
Step 2: If the room doesn’t heat up and no lint is found on the floor, you’ve successfully reattached the hose.
When to Call a Professional?
While many dryer vent issues are DIY-friendly, some situations warrant professional help –
Gas Dryer Complications: If you have a gas dryer and feel unsure about disconnecting or reconnecting the gas line, call a pro. The risk of gas leaks is not worth the DIY savings.
Extensive Vent Cleaning: If your vent system is very long, has multiple bends, or vents through the roof, cleaning can be challenging and dangerous. Professionals have specialized tools to thoroughly clean these complex systems.
Damaged Fittings: A professional can ensure proper replacement and sealing if the problem isn’t the hose but damaged wall vents or dryer connectors.
Persistent Issues: If you’ve tried the DIY fixes and the hose still won’t stay on, or if your dryer takes forever to dry clothes even with a clear vent, it’s time to call in the experts. There might be hidden issues like a malfunctioning dryer fan or incorrect vent installation.
Signs of a Deeper Problem: Excessive lint (despite regular cleaning), a burning smell, or moisture around the vent can indicate more serious issues. These could be fire hazards or lead to mold growth, requiring immediate professional attention.
End Note
A detaching dryer vent hose is more than an annoyance; it’s a red flag for inefficiency and potential danger. By understanding the types of hoses, the reasons for detachment (from loose clamps to curious pets), and the steps to fix it, you’re not just solving a problem—you’re safeguarding your home and optimizing your appliance.
Regular maintenance, from tightening clamps to annual deep cleaning, can prevent most issues. And when DIY isn’t enough, especially with gas dryers or complex vent systems, don’t hesitate to call a professional. After all, peace of mind knowing your dryer is running safely and efficiently is worth far more than the cost of a service call.
Related FAQs
Can I use duct tape to secure my dryer vent hose?
No, never use regular duct tape. It can dry out, become brittle, and create a fire hazard. Only use foil tape that’s specifically UL 1918 listed for dryer vents, and even then, consider it a temporary fix until you can properly secure or replace the hose.
My laundry room smells musty even with the hose attached. What’s wrong?
This could indicate that your vent hose has a small leak or your outdoor vent flap isn’t opening properly. The damp, warm air is likely escaping into your laundry room, creating a perfect environment for mold. Check for small tears in the hose and ensure the outdoor vent opens and closes freely.
I live in an apartment and can’t access the full vent system. What can I do?
Focus on what you can control. Keep your dryer’s lint trap clean (every load!), regularly check and secure the hose connection, and report any issues like longer drying times to your landlord. They are responsible for maintaining the full vent system, and in many areas, are legally required to do so for fire safety.