Miter Countertop Not Lining Up
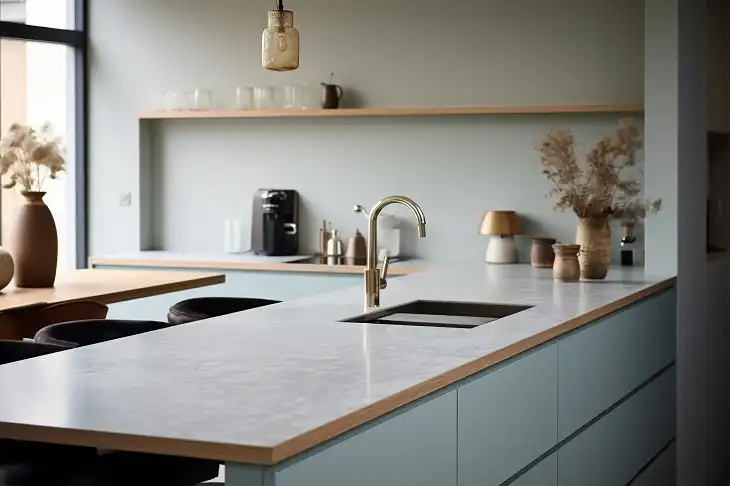
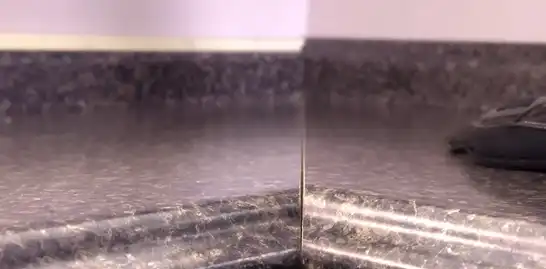
A miter countertop not lining up is a common issue that many homeowners encounter during installation. This happens when two countertop pieces, typically meeting at a corner, are not properly aligned, leaving gaps or uneven edges.
These problems can be unsightly and reduce the overall structural integrity of the countertop. Fortunately, there are several ways to address and fix these alignment issues. By using the right tools and techniques, you can achieve a seamless fit between the two sections. And that’s what this article talks about in depth.
Causes of Miter Countertop Misalignment
Before jumping into the solutions, it’s essential to understand why mitered countertops don’t line up properly. Misalignment can happen for a variety of reasons:
- Inaccurate Cutting: Even a small error during cutting can result in uneven joints.
- Out-of-Square Walls: If the walls where the countertops meet aren’t perfectly square, the angles can misalign.
- Uneven Substrate or Cabinets: If the base or cabinetry underneath isn’t level, the countertops won’t sit flush.
- Wood Expansion or Contraction: Wood or wood-based countertops may expand or contract due to temperature or humidity changes, leading to gaps or alignment issues.
How Do You Level an Uneven Countertop?
Fixing a misaligned miter joint requires a combination of precise measurements, proper tools, and attention to detail. Below are several methods to help you correct this problem.
1. Adjust the Cut
The most effective way to fix a poorly aligned miter joint is to adjust the cut. If the countertop sections were not initially cut at the correct angle, you may need to recut them. Here’s how:
- Measure the Angle Correctly: Use a digital angle finder or a miter angle gauge to measure the exact angle of the corner where the two countertop pieces will meet. If the cut was made at a standard 45-degree angle but your corner isn’t exactly 90 degrees, the pieces will not line up properly.
- Re-cut Using a Circular Saw or Table Saw: Once you’ve identified the correct angle, carefully re-cut the mitered edges. Ensure your saw blade is sharp and aligned correctly to avoid further errors. Recutting is especially crucial if the gap between the two pieces is large or uneven.
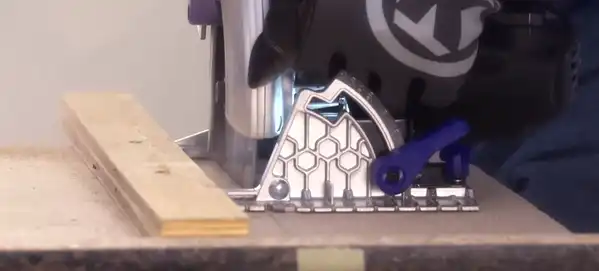
This method is the most precise but may not always be feasible if the countertop has already been installed or cannot be removed easily.
2. Sanding and Filing
If the misalignment is minor, you may be able to correct it by sanding or filing the mitered edges. This method is suitable when the gap or unevenness is small.
- Use a Fine Sandpaper or File: Gently sand the edges where the two sections meet. Be sure to apply even pressure to avoid creating new gaps or misalignments. A fine-grit sandpaper (around 220 grit) will allow you to smooth out small imperfections without removing too much material.
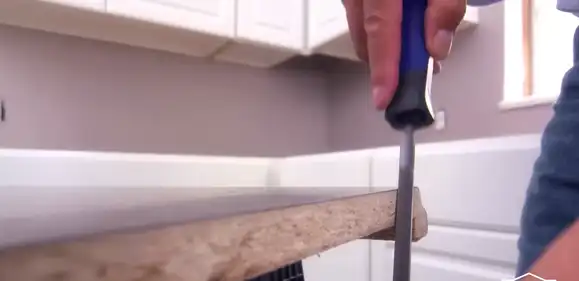
- Check Progress Regularly: After sanding, fit the two pieces together to check if the alignment has improved. Repeat the process as needed until the joint is smooth.
This approach works well for minor adjustments but can be time-consuming if the gap is large.
3. Shim the Countertop
If the issue is related to an uneven substrate or cabinets, shimming might help. Shims are thin pieces of wood or plastic that can be inserted underneath the countertop to level it.
- Identify Low Spots: Use a spirit level to determine where the countertop is uneven.
- Insert Shims: Gently lift the countertop and insert shims underneath the low spots. You can use wood or plastic shims to raise the section and bring it into alignment with the other piece.
Shimming is effective when the misalignment is due to an uneven base but doesn’t address problems with the actual cut of the countertop.
4. Clamping and Gluing
When the miter joint is close to aligning but still has a small gap, using clamps and glue can help pull the pieces together.
- Apply Wood Glue: Spread a thin layer of wood glue along the edges of the miter joint.
- Use Clamps to Secure: Place clamps across the joint to pull the two pieces together. Tighten the clamps until the gap is closed, but be careful not to overtighten, which could cause the countertop to warp or crack.
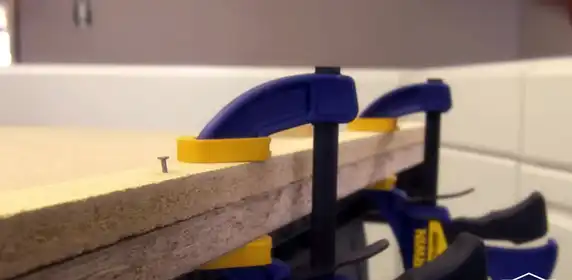
- Let it Dry: Allow the glue to dry completely before removing the clamps.
This technique can only work if the misalignment is minimal and there are no significant issues with the cut or base.
Frequently Asked Questions
How to fix a gap in a laminate countertop?
Find a gap cover that matches the color of your countertops. These are long, T-shaped pieces made of plastic or silicone. You can find them at your local hardware store or online.
Should countertops be perfectly level?
Yes, countertops should be as level as possible. This is important for water control. If water spills onto the countertop, a level surface helps it stay in one place instead of spreading out. This prevents water from seeping into the countertop or damaging cabinets.
Conclusion
By ensuring accurate measurements, using appropriate tools, and following the steps outlined in this article, you can achieve a seamless and professional-looking countertop installation. If you encounter persistent challenges, consulting a professional countertop installer may be the best course of action.