Installing Wall Angle for Drop Ceiling Around Outside Cambered Corners – Hard to Do?
Have you ever faced the challenge of installing a drop ceiling around those elegant curved corners in your space? I know it might seem intimidating at first, but I’m here to tell you that while it requires some extra attention, it’s definitely manageable. Let me walk you through everything you need to know about tackling this unique installation challenge.
When it comes to modern architecture, cambered corners add a touch of sophistication to any room. These gentle curves create a flowing aesthetic that’s quite different from traditional sharp corners. However, they do present some interesting challenges when it comes to installing drop ceilings, particularly with the wall angle installation.
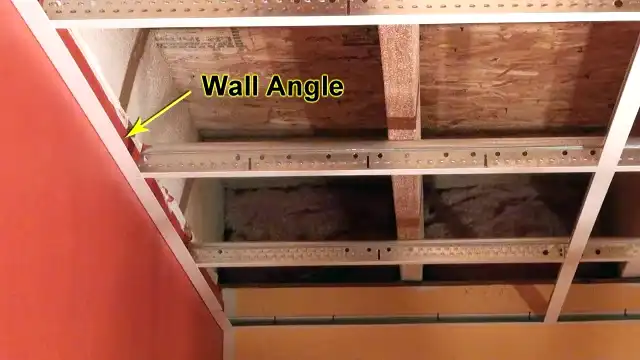
Primary Issues You Will Face while Installing Wall Angle for Drop Ceiling around Outside Cambered Corners
When working with cambered corners, there’s one thing I’ve learned that makes all the difference: understanding what you’re up against before you begin. The main challenge isn’t just about attaching the wall angle – it’s about achieving that perfect curved transition that follows your corner’s unique shape.
The traditional wall angles you’ll find in most hardware stores are designed with straight lines in mind. This means you’ll need to either find specialized curved wall angles or modify standard ones to follow your corner’s curvature. In my experience, the availability of pre-curved wall angles can be limited, so knowing how to customize standard wall angles is often your best bet.
Steps to Install Wall Angle Around Outside Cambered Corners for Drop Ceiling
The secret to a successful installation lies in careful preparation and execution. Let me share my detailed process that has worked consistently well for these tricky installations.
First, let’s talk about getting your measurements right. I always start by measuring the radius of the curved corner using a flexible measuring tape. This helps me determine exactly how much wall angle material I’ll need, plus a little extra for safety. I typically add about an eighth of an inch to my measurements to allow for any minor adjustments during installation.
Second comes one of the most crucial parts – cutting the wall angles. Instead of making a single 90-degree cut like you would for a standard corner, you’ll want to make several smaller cuts at 22.5-degree angles. This creates a series of small segments that can follow the curve of your corner much more naturally. I’ve found that making these cuts on the bottom flange of the wall angle allows it to bend more easily while maintaining its structural integrity.
For the actual installation process, I always begin with the straight sections first, working my way toward the curved corner. Using a laser level is absolutely essential here – it ensures your wall angle maintains a consistent height all around the room. When securing the straight sections, I prefer using drywall screws placed every 16 inches if I’m working with drywall, or masonry anchors if I’m dealing with concrete walls.
When you reach the curved section, this is where finesse comes into play. After making your 22.5-degree cuts, gently bend the wall angle to follow the curve of your corner. The key here is to work slowly and make sure each segment sits flush against the wall. If you notice any gaps, you might need to make additional cuts to achieve a smoother curve.
For a truly professional finish, I recommend using a slip-on outside corner piece if you can find one that matches your corner’s radius. This not only creates a cleaner look but also helps protect the edge of your wall angle from damage.
The final step involves checking everything with your level one more time and making any necessary adjustments. Pay special attention to the transition points where the curved section meets the straight sections – these areas should be smooth and seamless.
Conclusion
After years of working with drop ceilings, I can confidently say that while installing wall angles around cambered corners might seem daunting at first, it’s absolutely achievable with the right approach and attention to detail. The key is taking your time with the measurements and cuts, and not rushing the installation process.
Remember, every curved corner is unique, so don’t be afraid to make adjustments to these techniques to suit your specific situation. If you’re feeling unsure about any part of the process, feel free to leave a comment below with your questions. I’m always happy to help fellow DIY enthusiasts tackle these challenging projects!

