Why is Caulk Not Drying?
Caulking is an essential home maintenance task that helps seal gaps and prevent moisture intrusion. However, sometimes you might find yourself frustrated when the caulk just won’t dry properly. This can be a perplexing issue that leaves many homeowners scratching their heads. Understanding the reasons behind slow or incomplete caulk drying is crucial for achieving a perfect seal and ensuring the longevity of your home improvements.
The process of caulk drying is more complex than it might seem at first glance. Multiple factors can interfere with the curing process, turning what should be a simple home repair into a challenging task.
In this article, I’ll explain the common reasons why caulk might not be drying and provide practical tips to ensure a successful caulking project.
Reasons Behind Your Caulk Isn’t Drying
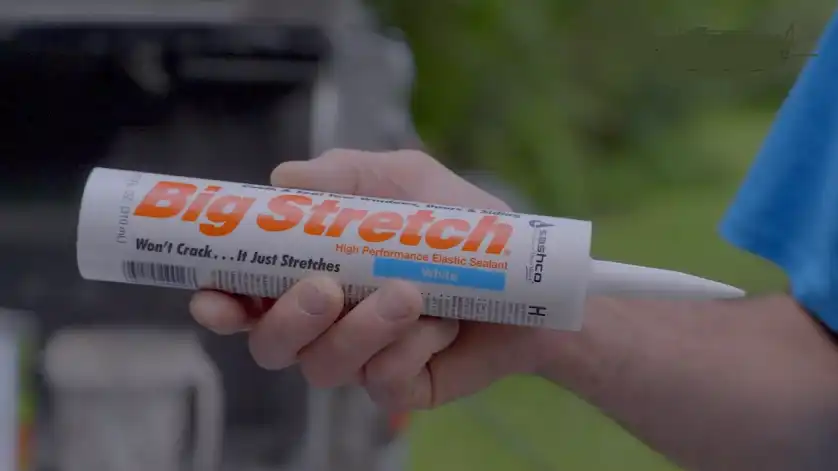
Caulk drying can be influenced by several environmental and application-related factors. Let’s find out the most common reasons that might be preventing your caulk from setting properly.
High humidity is one of the primary culprits behind slow-drying caulk. When the air is saturated with moisture, it creates a challenging environment for caulk to cure effectively. Latex-based caulks are particularly sensitive to humidity levels. The excess moisture in the air can significantly impede the evaporation process, leaving your caulk perpetually wet and unable to form a solid seal.
Temperature plays a critical role in caulk drying. Most manufacturers specify an ideal temperature range for caulk application, typically between 40°F and 100°F for latex caulks. When the ambient temperature falls outside this range, the chemical process that allows caulk to dry and cure becomes compromised. Extremely cold temperatures can slow down the chemical reactions, while excessive heat can cause rapid surface drying without proper internal curing.
The thickness of caulk application is another crucial factor that many DIY enthusiasts overlook. Applying caulk in thick beads can dramatically extend drying time. A thick layer of caulk creates a barrier that prevents moisture from evaporating efficiently. The more caulk you apply, the longer it will take for the entire bead to dry from the surface to its core. This is why professional painters and handymen recommend applying thin, even layers of caulk.
Product age and storage conditions can also significantly impact caulk performance. Caulk that has been stored for an extended period or past its expiration date may lose its ability to cure properly. Silicone caulks are particularly prone to this issue. An old tube of caulk might remain perpetually sticky, never achieving the hard, protective seal you’re looking for. Always check the expiration date and storage conditions before use.
Water exposure is another critical factor that can prevent caulk from drying. If latex caulk gets wet shortly after application, it can completely disrupt the drying process. This is especially problematic in humid environments or areas prone to splashing. Water interferes with the chemical curing process, leaving the caulk in a perpetual state of wetness.
How Long It Will Take to Dry the Caulk?
Understanding the drying timeline of caulk can help manage your expectations and ensure proper application. The drying process occurs in several stages, each with its own characteristics and requirements.
The first stage is the tack-free phase, which typically occurs around 30 minutes to an hour after application. At this point, the caulk develops a thin outer skin. It feels dry to a light touch, but it’s not yet ready for further treatment. This stage might give you a false sense of completion, but it’s crucial to understand that the caulk is far from fully cured.
Most caulks become paint-ready within two to four hours after application. However, this doesn’t mean the caulk has completely dried through. It simply means that you can safely apply paint over the caulk without causing significant disruption to the curing process. But be cautious – the internal layers are still in the process of hardening.
Full curing is a more extended process. Generally, caulk reaches its full cure state in about 24 hours. During this time, the material transforms from a wet, malleable substance to a solid, protective seal. Some specialized caulks might take up to three to seven days to achieve complete curing. Patience is key during this process.
What to Do If the Caulk Remained Undry
When faced with stubborn, uncured caulk, you have several strategies to address the issue and achieve the desired result.
Environmental control is your first line of defense. If humidity is high, consider using a dehumidifier or air conditioning to create a more conducive drying environment. Aim to maintain the temperature within the manufacturer’s recommended range. Proper ventilation can also help expedite the drying process by promoting air circulation.
Sometimes, the best solution is simply patience. If the caulk has been applied recently and it’s been less than a week, giving it more time might resolve the issue. Different caulk formulations have varying curing times, so don’t rush to remove the application immediately.
If waiting doesn’t yield results, removal and reapplication might be necessary. Use a putty knife to carefully remove the uncured caulk. Before reapplying, ensure you’re working in optimal conditions. Choose a new tube of caulk and pay careful attention to application techniques and environmental factors.
Always verify the expiration date of your caulk before use. An expired product is unlikely to cure properly, no matter the application technique. When in doubt, invest in a fresh tube to ensure the best possible results.
For silicone caulk that remains soft after several days, consider your application technique. Excessive application can prevent oxygen from reaching the material, which is crucial for the curing process. Apply thin, even beads and ensure proper ventilation.
Conclusion
Achieving a perfect caulk application requires understanding the intricate process of curing and the various factors that can influence it. From humidity and temperature to application technique and product age, multiple elements play a role in successful caulking.
Remember, patience and attention to detail are your greatest allies in home maintenance projects. Don’t get discouraged if your first attempt doesn’t yield perfect results. Each project is a learning experience that helps you refine your skills.

